Thursday 25 April 2013

Ti10x redux

I've fancied a fixie / single-speed bike for quite a while. Then I got lucky on a White Industries-hubbed wheelset on eBay, and TiENO.lite was born.

Round about the same time, I bought a Litespeed Ultimate frameset. So the original Litespeed Tuscany frame has gone over to TiENO.lite, and Ti10x is getting a frame transplant.


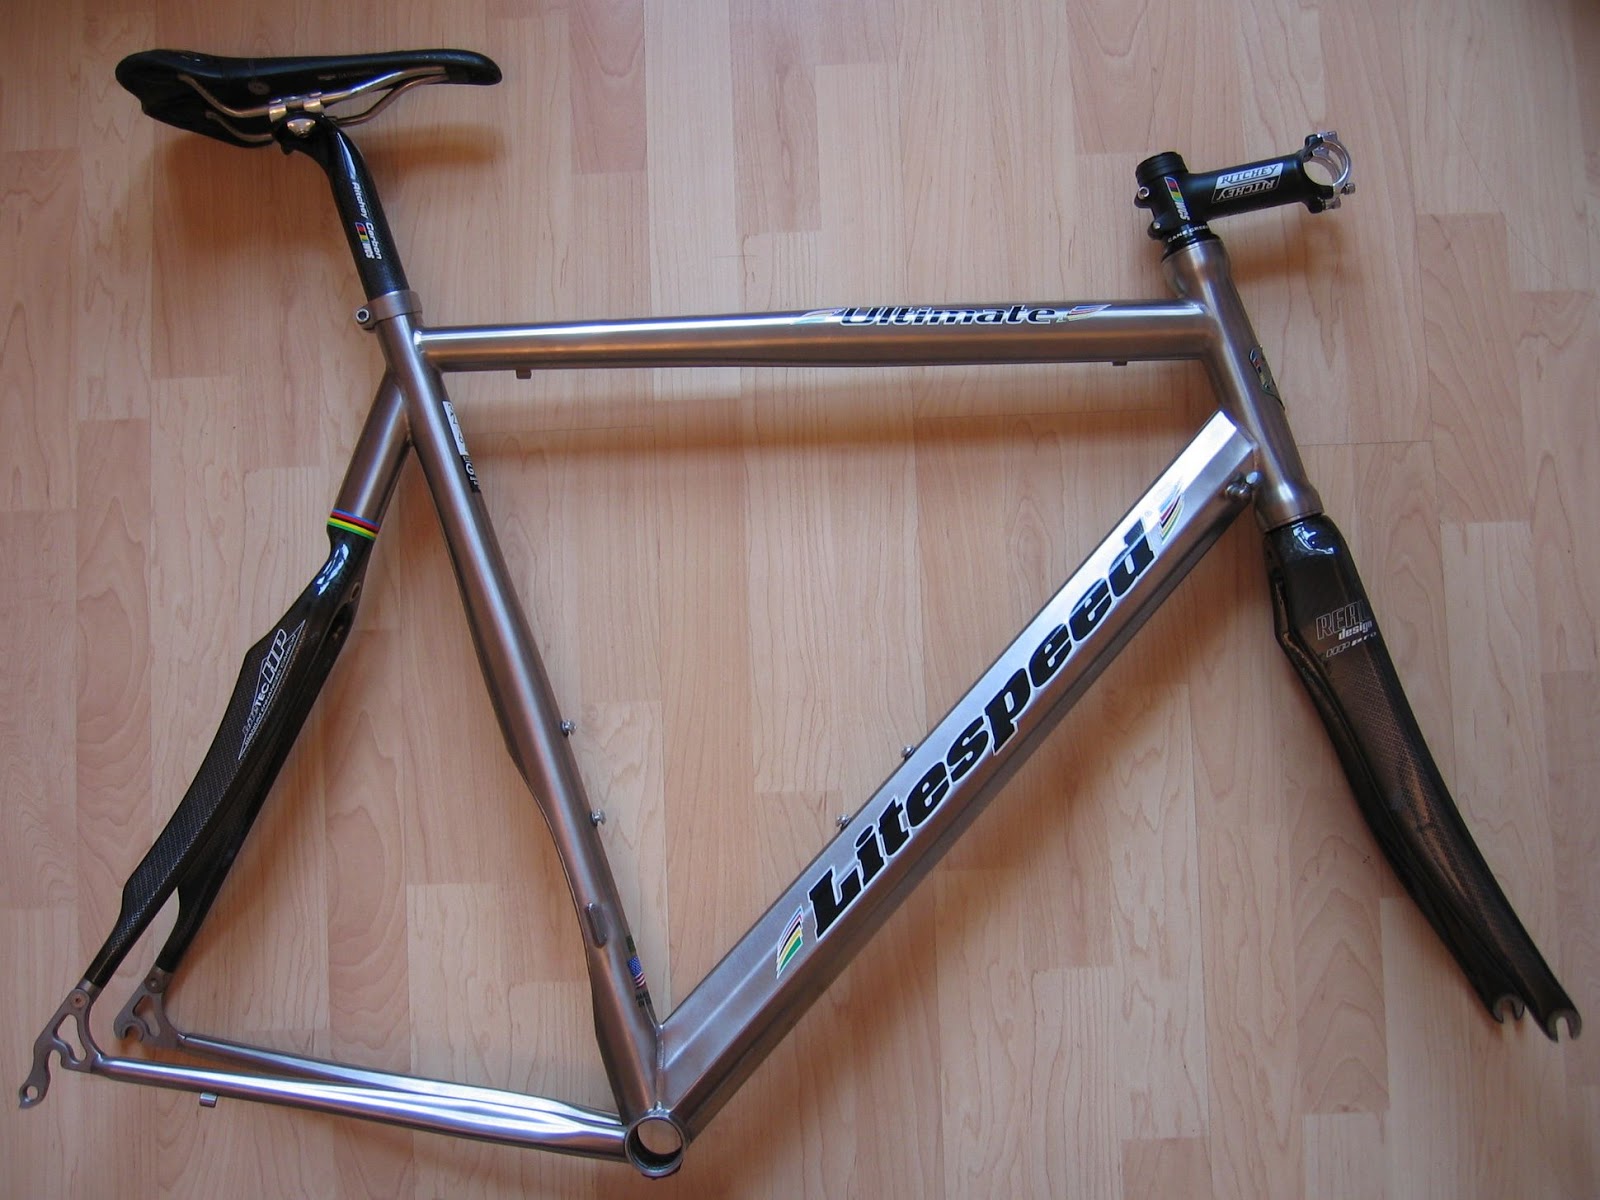
Here's what was included:
 - Litespeed Ultimate frame - size 59 (seatpost tube 57cm C-C, 61cm C-T)
 - Litespeed titanium seatpost clamp
 - Real Design HP Pro carbon fork
 - Real Design stem cap and bolt (just guessing, but I presume the star nut is also probably Real Design)
 - Cane Creek IS6 headset
 - Cane Creek Interlok stem spacers (5+5+3=13mm) = 4.9g
 - Ritchey WCS alloy stem (31.8mm x 12cm) = 112.7g
 - Ritchey WCS Carbon seatpost (31.6mm) = 174.7g
 - Selle Italia saddle, carbon fibre base, Vanox rails = 204.4g
 - 4 x bottle cage bolts = 13.3g

  The frame, headset, fork with star nut, stem cap with bolt, and seatpost clamp weigh 2148g.

Tuesday 27 November 2012

New chain shortened, reweighed, & fitted

Following the initial trouble-free test rides, the borrowed 110 link chain has been returned, and a new one has now been shortened from 114 links to 110, reducing its weight from 251.5g to 242.5g (including the 2.5g Powerlock link), and fitted. No final decision yet on whether or not to go all the way to 108 links.

Wednesday 21 November 2012

Carbon fibre seatpost plus titanium headset cap & bolt delivered & weighed

The Hylix carbon fibre seatpost weighs in at a favourable 163.3g (claimed was 160g) for its full 400mm nominal length (it's actually just over 390mm, with 357mm of 27.2mm diameter post, of which 244mm is above the "0" insertion marker). However, the stand-in seatpost currently fitted has 20mm of setback, and I've already repositioned the saddle almost as far back as it will go, which doesn't bode well for the Hylix post, which has no setback. Maybe the stand-in post is going to stay put, and the Hylix is going to pass through eBay for a second time - a few more rides will tell. But the stand-in post, even though it's already been shortened, is heavier - I'm reserving final judgement on its potential permanence.

The J&L titanium headset cap and its titanium bolt weigh 11.1g (claimed was 11.0g). Unlike the current plastic M:Part cap, which has a rounded underside, the titanium cap has a flat underside with a slightly raised circular locating ridge. The ridge is slightly smaller in diameter than the internal diameter of the steerer tube, and almost shallow enough for the cap to fit perfectly without needing the stack spacer that's currently sitting under the stem. If I get the height of the ridge reduced slightly, I'll be able to save a total of 6.8g by discarding the spacer and fitting the titanium cap and bolt in place of the M:Part equivalents, and I'll have the absolute maximum surface area contact between the stem and the steerer.

Before:
 - M:Part cap = 8.6g
 - M:Part bolt + washer = 8.3g
 - stack spacer = 1.0g
 - total = 17.9g

After:
 - titanium cap = 6.3g
 - titanium bolt = 4.8g
 - no spacer = 0.0g
 - total = 11.1g

Total weight saving = 6.8g (!)

And the free socks? As expected, way too small! Gave them away without even bothering to weigh them...  ;-)

Saturday 17 November 2012

ESI grips ordered

Still undecided on colour, so I've ordered a black pair as they'll have multiple alternative uses if I eventually decide I really must have another colour for Ti10x.

Best price I could find was from a USA seller on eBay. I went for the very slightly more expensive ($1.30) option, which includes an ESI-branded Specialized water bottle:
 - http://www.ebay.co.uk/itm/260946381950
 - http://www.esigrips.com/GripsInABottle.htm
 - 60g/pair (claimed)
 - £15.27 (including £3.25 delivery)

eBay/Paypal applied their usual exchange rate rip-off - advertised price is $18.49, which eBay states is "approximately £11.67", and postage is $5.00, which eBay states is "approximately £3.16".

Now "approximately £11.67" + "approximately £3.16" is approximately £14.83 - right? Wrong. According to Paypal, it's (exactly) £15.27 - are we not supposed to notice?

Sunday 11 November 2012

First ride

Today I removed the bottom bracket bearings, derailleur, back brake, seatpost clamp, and bottle cages (basically everything in contact with the titanium frame), and applied Park Tools ASC-1 anti-seize compound before refitting them. I also applied Finish Line Fiber Grip to the fork steerer tube before properly cinching the stem.

Finally, I tidied up a few loose ends - I cut the inner brake and shifter cables to length and crimped their end caps in place, switched the orientation of the Cateye computer mount so I could move it from the handlebar to the stem, and fitted a stand-in seatpost and my Selle SMP Plus saddle.

And with that, we were all set. It wasn't a long ride (time was limited) but it was a good one!

In some ways it wasn't very interesting - no huge surprises, and nothing fell off! The only adjustments needed once I got going were to the saddle, moving it almost as far back as it can go and raising the nose slightly.

What was interesting was that the overriding first impression was how easy it is to accelerate and to push big gears. I know that really that directly equates to speed, but if I had to sum up in one word how it felt, it would be "effortless", not "fast" - probably because I was in no hurry.

No drivetrain problems, the relatively wide ratios felt fine, and shifting was flawless and without hesitation, even from 9th to 10th under load. Top feels plenty high enough, and I think bottom should be adequate.

The only thing needing urgent attention is the handlebar grips - I don't think I'd get very far on the temporary grips, I need to get those ESI grips ordered ASAP.

Saturday 10 November 2012

Fitting the Cateye V2/V3 speed & cadence sensor backwards

Why?  Because not only is the gap between the crank and the chainstay wider than the maximum reach of the cadence sensor arm (when it's mounted conventionally), but also because the (temporary) M590 cranks have hollow backs which would mean the cadence sensor magnet couldn't be ziptied into place without additional material to raise the magnet out of the recess.

How?  I fitted the sensor unit under the chainstay, instead of above it, so that the cadence sensor arm extends back towards the rear wheel, instead of forwards towards the bottom bracket (I couldn't fit it above the chainstay and turn it around, because the speed sensor only tilts in one direction).
The sensor unit mounted backwards under the chainstay, showing the alignment of the speed sensor with the speed magnet on the wheel spoke, and of the cadence sensor arm with the eventual position of the cadence magnet (concentric with the hole in the crank arm).
The cadence magnet attached itself to the inner end of the pedal spindle, but I was pretty sure magnetism alone wouldn't be enough to keep it there permanently. It couldn't be secured with a ziptie, because of course the pedal spindle would be in the way on the outboard side of the crank, so I popped the magnet out of its plastic holder, and used a short length of inner tube (with a small hole cut in it for the pedal spindle) instead.
The cadence magnet, looking lost in the depths of the hollow rear side of the crank arm.
L to R: about 25mm of inner tube, with a slightly elongated hole offset a little towards one end; pedal; cadence sensor magnet; and the plastic holder and ziptie that would normally secure the magnet.
The inner tube sleeve in position on the pedal spindle, ready to be fitted to the crank arm.
Pedal fitted, with magnet attaching itself to the inboard end of the spindle.
The inner tube sleeve pulled into position to secure the magnet.
Outboard view of the pedal spindle and inner tube sleeve in place.

Friday 9 November 2012

Test build almost complete

The first rough build is nearing completion - a test ride with a stand-in seatpost is imminent.

The brake cable problem has been resolved with a pair of alternative ferrules from MK Cycles, and I've temporarily fitted a couple of flimsy (7g each!) foam handlebar grips.

I've even installed a Cateye V2/V3 computer mounting kit, which is a story in itself - I ended up fitting the speed/cadence sensor upside down and back-to-front, and stuck the cadence magnet on the end of the pedal spindle - maybe I'll take some more photos and write that up tomorrow.


The M590 crankset is still fitted, as I haven't even begun the XTR M960 crankset modifications yet.

Having discussed the chain length issue with Mr Wotler et al, I've decided to leave the borrowed 110 link chain on for the first ride. If all is well, I'll then shorten a new chain to 110 and probably run that for a while, and reserve judgement on possibly going to 108 at a later date.

The next step, after a few test rides, will be to tear it down again and tackle the aesthetics.